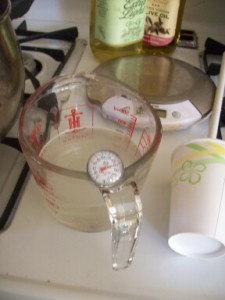
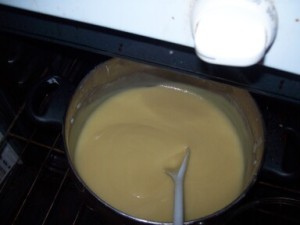
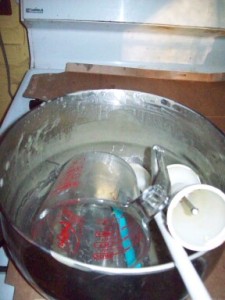
Handling a seize

February 14, 2012

You’re making soap, everything is going along fine, then you put in the scent. All of a sudden, the soap in the pot starts hardening as you watch. This is one good reason we have the mold ready. Here’s what else you can do.

First, be sure you’re using a quality fragrance oil. Don’t go cheap, you’ll pay for it by fading scent, or speeding trace.  Get your fragrance oils (FOs) from a reputable place, like Brambleberry, or Wholesale Supplies plus, a place that has fragrance oils for soap or candle making. They won’t steer you wrong.

The first, and possibly the most important thing here is to stir with a spoon after adding the fragrance oil. It’s already been explained how a stick blender can cause a false trace. Using it after adding the fragrance oil may precipitate the seize. For people who like their stick blender so much, hand stir at least half the time. Wailing away with the stick blender can cause other problems, like a moon surface on the soap when it’s hard, and speeds up trace when used after FOs that speed trace up. You don’t need two factors causing it.

Some FOs are known offenders, though. One of my favorites, Sun Ripened Raspberry from Brambleberry, is one. They do warn you when you buy, so you can take some precautions.

Add your fragrance oil at early, very thin, trace. This at least buys time to get it into the mold. What will work better is setting aside a portion of the oils, mixing the FO with it, and warming it a bit before adding at thin trace. Either way, stir with a spoon once you have added the FO.

You’re working with a new FO, and aren’t sure about it. You add at light trace,  stir 2-3 times, then realize you’ve got something the consistency of pudding already. Your mold is prepared, now glop, spoon, scrape, in any way possible, into the mold. Cover with plastic wrap or a plastic bag, and insulate the daylights out of it, like wrap it in a quilt. Put it somewhere and leave it be for about half an hour. It’ll get hot. When you take the quilt off, it will look like gel. It’s supposed to. DON’T TOUCH THE RAW SOAP. Smooth the top through the plastic, insulate with just a towel, and leave it alone until morning.

You add your FO, look away for half a second, turn back, and you have a pot of stone. Spoon embedded, the whole nine yards. You can put low heat under it, and begin stirring, adding water a drop at a time as the soap melts. Then you can put it in the mold.

And now I’ve told you all this nice stuff, I don’t do much of anything when the soap seizes. I turn on the oven, put the soap in there, and oven hot process. You’ll have to add more scent after cook, because it will likely cook off, but you’ll have your soap, and sooner than you expected.


Coloring soaps

January 7, 2012

Okay, folks, before I was so rudely interrupted…
Today we find out about coloring soap. Let’s start with the colorants.
First, test all new colorants. Even those you’re sure won’t change during saponification. It will tell you a lot about the colorant.
There isn’t a legal definition of natural colorant, keep that in mind. There are plenty colorants to find in the grocery store. Cocoa powder, turmeric, paprika. The list is pretty endless. Just remember that natural doesn’t necessarily mean good. Do your homework on colorants. Understand, especially with wildcrafted herbs, you won’t get the same color each time. It all depends on concentration of the color in the plant.
This is not for the squeamish: Not all colorants are of plant origin. Some are ground up bugs, for instance. Do your homework.
Oxides and ultramarines are considered pigments. Pigments have been lab produced since the ‘70s. Before that, they were mined, then the FDA decided they wanted some sort of purity evaluation. They are considered the same molecular structure, but arrived at by a different process. Some iron oxides are still naturally extracted, but tend to be found with heavy metals and other toxic stuff.
Cool thing about pigments is that they’re really stable–won’t change colors on you during saponification. They do have a tendency to clump. Mix them in with a little soap, you’re aiming for toothpaste consistency, then add to the pot.  Or put it through a latte frother with a little bit of oil.
Soap pigments are very reasonably priced.
Micas are actually under the jurisdiction of the FD&C. While considered a natural product because it’s mined, it’s also processed with colorants to produce that shimmer and sheen that looks so cool.
They don’t clump, but you have to use a lot to get that shimmer to show in cold process. Personally, I relegate micas to melt and pour. (Which we’ll get to. Artistry in soap.) Because they’re processed with colorants, they may not be stable in cold process.
FD&C colorants are produced in labs. Period. End of sentence. No exceptions. They are concentrated, very cost effective, and hold the color in melt and pour soap. The down side is they tend to react with the lye and the color will change in cold process. Remember, that may not always be a bad thing.
All together now: Test your colorants. Do your homework.

It’s a long story

January 6, 2012

But I can start working on this blog again. I had to leave Ohio, I’m in Rough and Ready, CA. But I can do this again.

Deciding on a process

February 16, 2010

Hot process, cold process, in the mold process. They all have their merits. How do you decide which to use?

Are you making soap for a craft fair next week? Hot process, or in the mold. If you can wait, or you’re just making product to sell, cold works fine. You can use any process on just about any soap. There are exceptions, of course.

If you are making a soap with a beneficial ingredient in it, say, cucumber, that really can’t be hot processed. Cold process is a good method for milk soaps, and soaps with beneficial ingredients that may be destroyed by heat. Our cucumber soap, for instance. Add the cucumber at heavy trace, when it’s resembling pudding used for pie filling. Put the soap in the mold. If you put it up on the fridge (where I put my stuff) to leave it alone, it will go into gel. Gel isn’t such a bad thing. But you have added the cucumber for skin benefits. The cucumber will cook if it goes into gel. The answer: Avoid gel. I put the mold in the fridge for that.

Mind, put it in the fridge, not the freezer. Once it’s frozen, soap doesn’t act right. Not working with it, not washing with it. Put it in the fridge, and don’t let it freeze.

Milk soaps are another reason to avoid gel. Soaps with milk and/or honey tend to get HOT in gel, and can burn the milk. Not only that, but in making a milk-based soap, the lye is added to the liquid at the beginning, not at trace. This is what I do in that situation.

Let’s say the formula calls for 8-12 oz of liquid. I’ll use the higher amount. I’ll dissolve the lye into 4 oz of water, and let it cool completely.  It will get gelatinous. Then, slowly, I’ll mix in the milk before adding to the fats. Milk stays cool, doesn’t burn. When you put your soap in the mold, put it in the fridge to leave it alone. This way you get the benefit of the milk.

(My observation only, handling the lye like this does seem to speed up trace.)

Remember in making soap that you WANT the milk fat. You’re putting it on your skin, not drinking it. I strongly suggest using full fat milk. This is an excellent skin conditioner. If you are making soap with buttermilk or cream, add at trace, you won’t be using so much. If you are making soap with ghee (clarified butter), or any kind of butter, add it in with your oils.

Try the different processes. You may find one formula comes out better with hot process than cold, or vice versa. Or treat each formula differently. It depends on what you want for the final product.

Oven hot process

February 15, 2010

Sorry about the huge break, my life went nuts for a bit.

Okay, folks, now you’re going to learn Hot Process.

Hot process doesn’t differ all that much from cold process in terms of the formulae. What hot process does is takes the soap through the whole saponification process in one day. There are different methods of hot process, such as in a slow cooker, or on top of the oven, with either direct heat, or in a double boiler. There’s even a method for doing it in the mold. The reason I chose oven hot process is that, in direct heat hot processing, you stand there and stir, for hours. And you can’t really walk away until the soap starts boiling up, looks like it’s rising. With the slow cooker and double boiler methods, you  can at least walk away long enough to use the bathroom. I don’t use those because of boilover issues. The oven I can line with something to catch the boilover. Can’t do that with a flame right there.

In the mold hot process is kinda like combining cold and hot process. You add everything, your superfat, your fragrance and such at trace as usual. Pour into the mold, lined, like I showed you in cold process. Then put it in a 250° oven for about 3 hours. Turn the oven off, and let it sit in the oven until cool. I don’t use this method because I didn’t like the way the finished product came out. At an outdoor craft fair, it was that soap, the soap processed in the mold, that melted in the sun. The others didn’t. So, I don’t use that process. Go ahead and try it. You might like it.

You will be learning oven hot process because it’s my blog, and that’s my favorite hot process.

We’re using the formula we came up with in the oil properties post:

16 oz olive oil

8 oz coconut oil

6 oz corn oil

2 oz safflower oil

8-12 oz liquid (I’ll be using spring water)

4.34 oz sodium hydroxide (this is for an 8% superfat)

Preheat your oven to 200-250°F

Measure out your water and lye. Remember, snow falls on the lake, lye to water. Set aside.

Measure out your safflower oil, which we will be superfatting with. Set this aside.

Now measure your fats, melt them, and stir a bit so they are mixed. Remember to fill the pot only a third of the way. You’ll see why.

Lye mix to fat mix. Stir the first 5 minutes with spoon, then zap with stick blender. Always stir down after using the stick blender, always end with the spoon. Mix until trace, then add your superfat oil, in this case, the safflower oil.

Trace. If you look, you can see the squiggles I made.

Covering the pan can slow a boilover, so is suggested. Place in the oven. Go away for 10 minutes.

cap it, put it in the oven

When you come back to stir, the mix will be kinda like a thick cake batter. Stir, cover, put it back in the oven. Go away for another 10 minutes.

it's kind of a heavy cream consistency here.

One of these times when you go back to stir, you’ll notice it’s separating. Don’t stress, it’s supposed to. Just stir, cap, put it back. However, this can move quickly, and I’ll post a picture next hot process I do. I missed it.

There will come a time when you go back to stir, and it’s foamy. This is what it’s supposed to do, and why you want the big pot. Just stir it down, cover, back in the oven for 10 minutes.

This is why you want an out-sized pan.

Eventually, you’ll go back to stir, and, when you stir it down, find yourself with a pot of something reminiscent of vaseline.

Fully cooked soap

Take a little of this on your glove (you remembered to wear them, right?), and add some water. If you get lather, you stick your tongue into what you have in your hand, testing for active lye. If there is active lye, you will know right away. It’ll stingle. Best way I can describe it. Not a lot, but enough. If the soap burns your tongue, back in the oven until it doesn’t. DON’T STICK YOUR TONGUE IN IT IF IT DOESN’T LATHER. Don’t ask how I know.

You didn’t really expect a picture of tongue testing the soap, did you?

Stir it a little, add your silk amino acids at this point, if  you’re using them. This is for the bacteria thing. Wait a few minutes for it to cool more, then add your scent and other additives. If the soap is too hot, it will evaporate the scent away.

Plop it into the mold. Smooth it over. Drop it from an inch or so above the table to level the top and fill in spaces.

plop it into the mold. I fold the plastic bag over it, and smooth it with my hands.

There is a theory I don’t know if I subscribe to. The theory is that, if you wrap the hot soap mold and all in a towel, it will return to gel, and smooth over the top. Now, so far, maybe it works, jury is still out. But I wrap it in the towel, set it in a level place and leave it alone.

This soap is ready to go when it’s cool. I’d like to add here that I let it dry for about a week after I slice it. I’ve used it when it cooled, but the finished product seems ‘more finished’ if I use it after a week.  I will, however, be using the pot scrapings in my shower tonight.

Fats, oils, and their properties

December 5, 2009

The olive oil soap we made is a good basic soap, gives you a hard bar and lather enough. What if you want something more conditioning, or a better lather? This is where essential fatty acids (EFAs) come in. The different fats and vegetable oils are made up of different EFAs, so, while olive oil will give you that stable lather, hard bar, and conditioning, maybe you like more lather. You would then use an oil that produces it, has a good content of Lauric acid. If you want your soap more conditioning, you put in an oil fairly high in oleic acid. This is called balancing a recipe. When you look what you want in your soap, and produce those results manipulating oils.

When you make soap, it’s not just what oils you use, it’s how you use them.

Because it’s my blog, and I do olive oil based soaps, we’re going to start with a pound of olive oil. It has high percentages of oleic acid, which conditions, and palmitic acid, which produces a hard bar and stable lather. You’re going to want lather and a rinse clean feeling. We’ll use coconut for its lauric and myristic acids. Maybe you’d like to add a pampering feeling. Maybe 6 oz of corn oil for its linoleic and oleic acids, which give that clean feeling and conditions. To round this out, for its oleic acid, 2 oz of safflower oil. This is gonna be one sweet bar for a bath.

Now, let’s talk about superfatting. If we put all the oils together in the pot, then add the lye, you will have the superfat you discounted for. In my case, I’d still have the 5-8% superfat, but it’s the lye that decides how much of what is left unsaponified.

Every oil has a certain amount of unsaponifiables, parts that the lye won’t bond with no matter what. Some oils, our safflower up there, for instance, is high in unsaponifiables. These are the things that condition our skin. Because the safflower oil is higher in these conditioners, you may want to keep more of those molecules unsaponified.

Set aside your 2 oz of safflower oil. Mix the other oils, add the lye at the right temp, and stir to trace. When the mix thickens, saponification has started. The safflower oil is added then, mixed in with your scent, and then the soap is poured into the mold. Put it where it won’t be bothered. Leave it alone.

There are tables all over the internet with the oils and their respective traits. There are also a few books out with this and more information. Susan Miller Cavitch, The Soapmaker’s Companion is a good one.

Anything you study, it seems there’s always at least one noncomformist. Let’s talk about castor oil. Castor oil is about 90% ricinolic acid. This lathers, conditions, but it makes a very soft bar in large amounts. It’s also very humectant (absorbs water from the air). I make a shampoo for myself, bar shampoo. It’s almost a quarter castor oil, mostly because it can attract water from the air. That makes it good for hair, but not so good for storing. I store that one with packets of dessicant.

Castor oil will also take its own sweet time reacting with the lye. I’ve had a batch of soap with castor oil sit in the mold for a month. Usually, I hot process anything with castor oil because I don’t want to tie up my molds for so long.

Another quirk of castor oil is, the lower the iodine in the oil, the harder the bar. The ricinolic acid has to break that rule, too. Castor has a moderate amount of iodine, not high, not low, but it will produce a soft bar. This should really be a minority oil.

Anything with castor oil in it will cure very slowly. Even with hot processing, I often let bars with castor cure for 2-3 months. The soap has a much richer lather.

So, here we go, fats, oils, and their properties, fast and dirty:

Lauric Acid produces a hard bar, fluffy later. In high amounts, over 33%, can strip skin oils. Lauric is found in babassu oil, coconut oil, palm kernal oil, and tallow.

Myristic acid makes for a cleansing feeling, hard bar, fluffy lather, but won’t strip oils. Found in Babassu oil, coconut oil, and palm kernal oil.

Linoleic acid provides light conditioning and that rinse clean feeling. This is found in most oils, as is Oleic acid. Oleic acid provides conditioning. Your best bet for these is nut and seed oils. Mango butter, apricot kernal oil, sunflower and safflower oils, grapeseed.

Palmitic acid provides a hard bar and stable lather. This is found in most oils, but specifically apricot kernal oil, lard, cocoa butter, and tallow.

Ricinolic acid is only found in castor oil. It lathers, conditions, but makes a soft bar in large amounts.

And, finally, stearic acid. This makes for a hard bar and stable lather. Found in mango butter, shea butter, and tallow.

These lists are by no means complete. Do your own research for more information.

With all this in mind, let’s go make our soap.

Oh, the cleanup

November 15, 2009

Here we go, guys. The Cleanup. We had our fun,  now to pay the price.

cleaning up the  mess

I know people who use lots of paper towels and wipe out the pot. I can’t justify using paper towels for that. I pile spoons and other tools in the pot, pour in a large quantity, like a cup, of vinegar, and fill it the rest of the way with water. Vinegar cuts grease, but also neutralizes the lye.

I let it sit an hour or so, then wash them by hand in Dawn dishwashing liquid.

If you are lucky enough to have a dishwasher, just put it all into the dishwasher. Be careful of the thermometer, depending on what you have, it can go through the grid in the basket and hold up the operation of the dishwasher. Fill the soap reservoir with vinegar, and turn on the machine.

Equipment and How to make basic soap

November 11, 2009

Yeah, you’re all chomping at the bit to make soap, but we gotta do the boring equipment stuff first.

First, you’re making soap, not a fashion statement. You have to just hope the man of your dreams doesn’t come to the door. Tie your hair back, wear ugly clothes over your other clothes. Goggles are a good idea.  Long sleeves and rubber or neoprene gloves. Shoes. You’re working with lye.

soapmaking clothes

Don’t be afraid of lye. Just respect what it can do. Wear the gloves and goggles. Don’t spill it. Keep vinegar around, it counters the alkalinity of the lye. If you get some on your skin, rinse it before you use vinegar on your skin. It hurts. Don’t ask.

When you go to get lye, read the label carefully. Unless you’re ordering from a soap supplier, be sure it’s not drain cleaner, but really lye. I get lye from the hardware store, in the drain cleaner section, but lye is just lye, no aluminum stuff added to it. Read the label carefully.
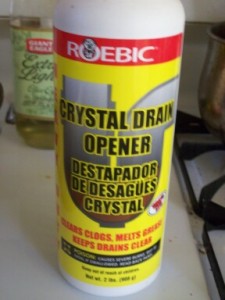
lye

You’re looking for a chemical reaction here, remember that. Your equipment should be as inert as you can make it. Use a stainless steel pot or a glass bowl for cold process. You want enough head room in the bowl or pot so you can stir fairly violently to speed saponification. Use something that can handle heat, but not react with the lye or oils. My spoons and ladles are plastic. I mix my lye and liquid in glass, a Pyrex measuring cup.
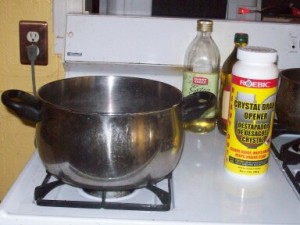
equipment

You are measuring by weight, not volume. Have a good kitchen scale, with a tare feature. Being able to zero it out is a necessary luxury. And have a good thermometer, like a candy thermometer. Needn’t be fancy, you need to measure temps before mixing with the fats and oils.
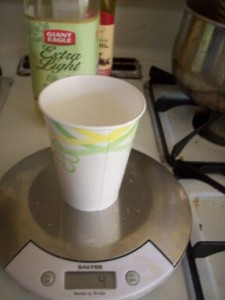
cup of lye-tare

About any fat can be used, depending on what results you want. Some oils are good for lather, some for that rinse clean feel, some for conditioning. We’ll go into all that later. For now, keeping everything simple, we’re making a basic castile soap. This is the historic Castile soap, made with olive oil, lye, and water.

Olive oil was the first oil to be made into soap. It’s said it was developed at Castile castle in the 1500s, to clean the wool before it was spun.

Every oil has a SAP ( saponification) value or SAP value range, the amount of lye it takes to saponify one ounce of the fat. There’s a whole arthimetic formula, and you can go find it. Majestic Mountain Sage has a lye calculator, Soapnuts has a lye calculator. If you’re good at Excel, you can probably make one for yourself.

The Majestic Mountain Sage lye calculator gives a range for liquids. This is to make things a little flexible, especially for big orders that need to be processed and packaged as quickly as curing soap goes. There is also a chart for superfatting. When you make soap, you don’t really want all the oil to saponify. This calculator shows the lye discount for your superfat. I superfat all my skin soaps by around 8%. Much higher, the bar is soft, and the oils can go rancid faster. Much lower, and it can be drying.

One more piece of equipment: Get a stick blender. It really speeds things up.  Hand stirring is good, but can take a while. Your saponifying to trace will got much faster using a stick blender or a hand mixer. But use the spoon to stir that down. You can get a false trace from using these appliances that will stir down with the spoon. When checking for trace, end with the spoon.
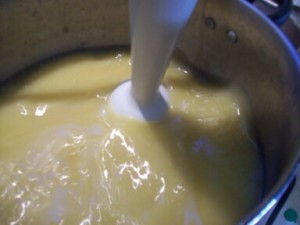
stickblender

What we’re going to do here, this being a simple formula, is take the soap to a light trace. As you stir or whip your soap, it will get creamier and thicker.When you can make markings on the surface of the soap and they stay for a bit in bas relief, add the fragrance, if any, and your soap will be ready for the mold.

Fragrance oils and essential oils can be used. In a two pound batch, which this is, I use 1/8 cup of scent. This comes out to a tablespoon per pound of oil. Fragrances are available at health food and bath stores.

Now, molds. Cold process doesn’t do that well in individual molds. Keep those for melt and pour, which I see as just plain fun. The mold for cold process can be a shoebox, or, really, about anything. I have wooden box molds, which I line with a plastic grocery bag, print side down. Your mold is ready.
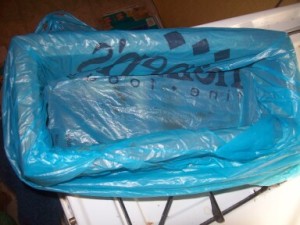
lined mold

So, with all this in mind, we’re going to make a two pound batch of Castile soap.

32 oz olive oil

8-12 oz water

3.99 oz sodium hydroxide.

This will give us a fairly hard bar that produces a stable, if unimpressive, lather. Made with only olive oil, this is good for dry or sensitive skin.

Put on your soapmaking regalia: Shoes (not sandals, shoes. Respect lye), apron or ratty shirt over other clothes. Long sleeves are preferable, rubber or neoprene gloves, goggles. Tie your hair back.

Measure your lye in a container on a kitchen scale. I use a paper cup, zero the scale out, then pour the lye into it slowly. My scale doesn’t do 3.99 oz, so I measured out 4 oz.  Set that aside.
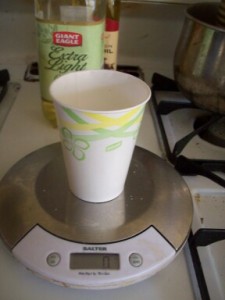
cupexothermic

I use a Pyrex measuring cup to measure out the water. Water was the standard, so 12 oz of water will weigh out to 12 oz. The water you use should be filtered at least, distilled at best. Tap water has too much stuff in it to use and get even results. Rainwater makes a good soap, too. Put it through a coffee filter.

This is important: Snow falls on the lake. That means add your lye to the water, not the other way around. The word ‘volcano’ describes what happens if you add water to lye. I was real glad I was mixing it outside when I found that out. Which brings me to ventilation. Mix the lye and water outside or near on open window.

What happens next is the lye will cloud the water, some nasty steam will rise out of the cup, and the container will get hot. It’s called an exothermic reaction.  If you put the thermometer in the cup, it can go as high as 160 degrees.

Leave your lye mix outside or move it to the fridge when the water clears.  It will be hot, and takes its time cooling. Cool this to about 90°. Heat the oil to slightly warmer, then add your lye mix to the oil. Take your plastic spoon, and start to stir. Stir for about the first 5 minutes.
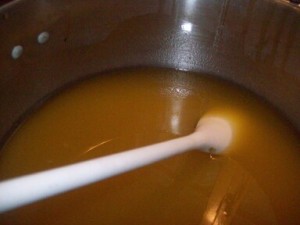
lye to oils

Use your stick blender or hand mixer for a few seconds, I do it to a count of 15. That’s pretty random, but you really don’t want to use it too much, or the bubbles it makes will give an uneven texture to the soap. Then stir down. I alternate the spoon with the blender. Put on my music, stir a bit, zap with the blender, stir until the next song, for the first 20 minutes. It will likely come to trace by then. If it doesn’t, you can walk away for a few minutes, then go back and stir again. Sometimes a stubborn batch will saponify to trace when you stay away for a few minutes.

When your soap is about the consistency of cake batter, check for trace. Take a spoonful of the batch and drizzle it over the top. If your drizzle stays raised from the surface for a few seconds, your soap is ready for fragrance and getting turned into the mold.

Trace

Add your fragrance, I gave my guidelines, find your own. Understand in cold process, the scent will change a bit and react with the lye and oils. For instance, it may fade as the soap cures. Not to worry, those usually come back. Some speed up trace, which is why your already prepared your mold, right? Some fragrance oils, vanilla in particular, will change the color of the soap.  The vanilla fragrance oil I use turns the soap a caramel color. I’ve had some vanilla scents that turn it a deep, chocolaty color. You can get a stabilizer, but I think it just lends character.

Add your fragrance, stir well, then pour the soap into the prepared mold.
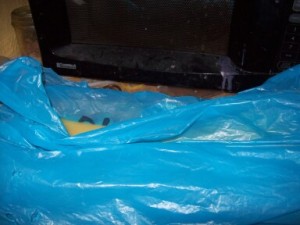
full mold

There is a little controversy about scraping the pot. I’ve heard you shouldn’t because the stuff on the sides isn’t mixed in enough. For myself, I see at least another bar of soap there, and I scrape the pot. It’s your decision.

You’ve got your soap in the mold. If trace has speeded up and it’s really thick, like pudding or mashed potatoes, smooth the top. I put the grocery bag over the top because I have cat hair everywhere. Then put your mold and its contents somewhere, and leave it alone.
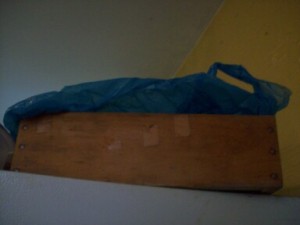
ontopthefridge

In the mold, the soap will heat up, and go through a gel phase. That’s what it looks like. The soap gets hot sometimes, especially milk soaps. Then it will cool and harden. Wait about 24 hours before you take it out of the mold. Even then, check it will hold its shape. That’s not a problem with this recipe, but there are those that take a bit longer. I had a batch with castor oil that took about a month to come out of the mold. Now I just hot process anything with castor oil in it. We’ll get to oils and their properties in probably the next post.

Your batch is hard. Grab the bag by the top and pull the soap out of the mold. Set it on a table, and carefully unwrap the plastic. Sometimes the soap needs to harden a bit more once the plastic is off. It’ll be doughy. Just keep it on the plastic and move it back to where you left it alone last night, and leave it alone again.

I use a miter box and a big knife I picked up at some garage sale or another to cut my soap. I scratched a line in it to measure my soap bars about 1 inch thick. I just slice it with the knife, and put it on racks.

Creative cubes make great soap drying racks. I have the grids all over the house, with soap curing on them.I cover my bars with a light sheet or muslin to keep bugs and dust off.

What happens here is the soap “gets used to being soap,” in that it dries a bit, saponification still continues, it becomes milder. This is the time when your scent may fade. As I said, they usually come back.

To test if your soap is shower- or bath-ready, wash your hands with a bar, wait a bit, then pay attention to the backs of your  hands. If they dry out after washing with that soap, the skin feels tight, it needs to sit a bit more. The bad part of this is it may have to sit as long as 6 weeks, depending on heat and  humidity. Obviously, it will cure a little faster in lower humidity. Heat just helps because the soap doesn’t have to deal with temperature, and can just cure.

When your soap is ready, it won’t be like the store bought stuff. The glycerin is still in it, there are no detergents. There are no stabilizer, either, so let it dry between uses. Get a good soap dish. The soap you’re washing with has what you put into it. And costs a lot less than that stuff at the store, too.

Soapmaking, A brief overview

October 28, 2009

We’re going to start with something basic: Soapmaking. This explains a bit about the chemistry of it, goes into the history, and defines some terms.

Archeologists have found evidence that a soap-like material was used before we left the caves. Fat from cooking animals combined with the wood ash from cooking, making this rudimentary soap. In Roman times, the washer women found that if they did their wash in water below the temple, the combination of wood ash and fat from animal sacrifices cleaned their clothing better with less effort. In the middle ages, soap was used mostly by the wealthy. It was a gelatinous substance, made from fats and wood ash. The hard bars we have now didn’t come about until after the industrial revolution, when sodium hydroxide was used.

Lye from wood ashes is Potassium Hydroxide (KOH). This is in the production of liquid soaps. Sodium Hydroxide (NaOH) is manufactured, and this is what hydrolyzes the oils and fats into the hard bar we know today.

Making soap isn’t that big a deal, really. Soap is chemically a salt: a precipitate of an acid (the fat) and a base (the lye). The lye is dissolved in a liquid, usually water, then added to the melted fats. The mix is stirred to “trace, ” about the consistency of pudding. Then the fragrance, if any, is added, and the soap is poured into a mold. The mixture hardens overnight, is sliced the next day, and set out to dry and continue saponifying (the reaction of the lye and fat). In 4-6 weeks, the soap is ready for use.

That is the cold process. I’ll be describing this process in the next post. We’ll go into hot process after the cold process instructions.